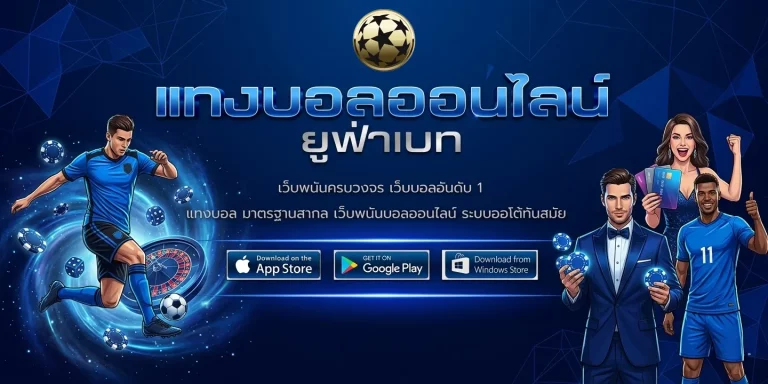


สำหรับแฟนฟุตบอลที่กำลังมองหาประสบการณ์การเดิมพันครบวงจร UFABET คือเว็บไซต์พนันออนไลน์ที่สมบูรณ์แบบสำหรับนักพนันชาวไทย ที่นี่คุณจะได้สัมผัสระบบที่ให้บริการโดยตรงและยุติธรรม พร้อมมาตรฐานใหม่ของการเดิมพันด้วยระบบอัตโนมัติที่ทันสมัยและรวดเร็ว ทุกขั้นตอน ตั้งแต่การลงทะเบียน การฝากเงิน ไปจนถึงการเดิมพัน ทำได้อย่างราบรื่น ปลอดภัย และเชื่อถือได้ UFABET ให้บริการอัตราต่อรองที่ดีที่สุดในตลาด และตอบสนองทุกความต้องการของผู้เล่น ด้วยตัวเลือกการเดิมพันที่หลากหลาย รวมถึงลีกมาเลเซีย ฮ่องกง ยุโรป และอื่นๆ ทำให้สมาชิกสามารถเข้าถึงการเดิมพันฟุตบอลได้ทุกประเภท
นอกจากนี้ UFABET ยังมอบความสะดวกและประสิทธิภาพสูงสำหรับผู้ที่สนใจศึกษากลยุทธ์ต่างๆ เช่น วิธีแทงบอลสูงต่ำ ซึ่งเป็นหนึ่งในตัวเลือกที่ได้รับความนิยมมากที่สุด เว็บไซต์นี้ให้ข้อมูลและเครื่องมือสนับสนุนเพื่อช่วยให้ผู้เล่นวิเคราะห์อัตราการทำประตู ฟอร์มทีม และสถิติการแข่งขันอย่างแม่นยำ ทำให้การเดิมพันทั้งแบบสูง/ต่ำมีโอกาสชนะมากขึ้น ระบบที่เสถียรและใช้งานง่ายของ UFABET รองรับการเดิมพันทุกแบบ ไม่ว่าจะเป็นลีกใหญ่หรือการแข่งขันสด ทำให้ผู้เล่นสามารถวางเดิมพันได้อย่างมั่นใจและเต็มไปด้วยศักยภาพในการทำกำไรสูงสุดในทุกแมตช์
การเลือกใช้เว็บไซต์พนันออนไลน์โดยตรง เช่น UFABET เป็นวิธีที่มั่นใจที่สุดในการรับประกันบริการที่โปร่งใสและปลอดภัย ปราศจากค่าธรรมเนียมแอบแฝง เว็บไซต์นี้ดำเนินการโดยตรงโดยไม่มีตัวแทนกลาง ทำให้ผู้เล่นสามารถวางเดิมพันได้อย่างมั่นใจ ระบบฝากและถอนเงินอัตโนมัติของ รวมเครดิตฟรี 50 ทํายอด 300 ถอนได้ 300 รองรับทุกธนาคารและ True Wallet ทำให้ธุรกรรมทางการเงินเสร็จสิ้นได้อย่างรวดเร็วภายในไม่กี่วินาที ผู้เล่นสามารถเข้าถึงเกมฟุตบอลและตัวเลือกการเดิมพันต่างๆ ได้โดยตรงจากเบราว์เซอร์ ไม่ว่าจะใช้มือถือ iOS หรือ Android ก็สามารถเดิมพันได้ทันทีโดยไม่ต้องติดตั้งแอปพลิเคชันเพิ่มเติม
นอกจากนี้ UFABET ยังมอบประสบการณ์การเดิมพันที่เหมาะกับทุกระดับทักษะ โดยให้ความสำคัญกับ วิธีแทงบอลสูงต่ำ และตัวเลือกการเดิมพันที่หลากหลาย ไม่ว่าคุณจะเป็นผู้เริ่มต้นหรือผู้เล่นมือโปร ระบบออกแบบมาให้ใช้งานง่าย อ่านข้อมูลสถิติ วิเคราะห์ฟอร์มทีม และติดตามอัตราต่อรองแบบเรียลไทม์ได้ทุกที่ทุกเวลา การเข้าถึงเว็บไซต์ด้วยระบบที่เสถียรและรองรับภาษาไทย ช่วยให้การเดิมพันของคุณราบรื่น สนุก และมีโอกาสทำกำไรสูงสุด UFABET จึงเป็นตัวเลือกที่เหมาะสมสำหรับผู้ที่ต้องการเล่นพนันฟุตบอลออนไลน์อย่างมั่นใจและสะดวกสบาย

เว็บไซต์พนันกีฬาออนไลน์ UFABET ได้รับการยกย่องว่าเป็น อันดับ 1 และ ได้รับความนิยมมากที่สุด จากผู้เล่นจริงนับล้านคนทั่วประเทศ ความไว้วางใจนี้สะท้อนให้เห็นถึงมาตรฐานการบริการระดับสูงที่รักษาอย่างต่อเนื่องในทุกด้าน ทำให้ UFABET เป็นต้นแบบที่เว็บไซต์พนันอื่น ๆ พยายามเลียนแบบ ระบบของเรารองรับการเดิมพันทุกประเภท รวมถึง วิธีแทงบอลสูงต่ำสล็อต การวิเคราะห์อัตราต่อรองแบบเรียลไทม์ และตัวเลือกการเดิมพันที่หลากหลาย ผู้เล่นสามารถใช้ประโยชน์จากเครื่องมือและข้อมูลเชิงลึกเพื่อเพิ่มโอกาสในการชนะอย่างมั่นใจ การออกแบบระบบที่เสถียรและปลอดภัยช่วยให้การเดิมพันทุกครั้งราบรื่น และคุณสามารถเข้าถึง วิธีแทงบอลสูงต่ำเว็บพนัน ได้อย่างสะดวกทั้งบนมือถือและคอมพิวเตอร์
นอกจากนี้ UFABET ยังให้ความสำคัญกับความปลอดภัยและความเป็นส่วนตัวของผู้เล่นทุกคน ระบบรักษาความปลอดภัยที่เข้มงวดและเทคโนโลยีทันสมัยช่วยปกป้องข้อมูลส่วนบุคคลอย่างเต็มที่ ทำให้คุณสามารถสนุกกับการเดิมพันโดยไม่ต้องกังวล เรามีการอัปเดตระบบอย่างต่อเนื่องเพื่อให้ผู้ใช้ได้รับประสบการณ์ที่ดีที่สุด รวมถึง วิธีแทงบอลสูงต่ำเว็บตรง สำหรับสมาชิกที่ต้องการเข้าถึงตลาดฟุตบอลแบบมืออาชีพและเชื่อถือได้ ทุกขั้นตอนการฝาก ถอน และเดิมพันทำได้ง่าย รวดเร็ว และตรวจสอบได้ ทำให้ UFABET ยังคงเป็นเว็บไซต์พนันกีฬาออนไลน์ชั้นนำที่สร้างความมั่นใจ ความภักดี และผลตอบแทนที่คุ้มค่าสำหรับผู้เล่นทุกคน
ที่ UFABET เราให้ความสำคัญกับความรวดเร็วและความน่าเชื่อถือของระบบการเงินเป็นอันดับแรก เพื่อให้ผู้เล่นได้รับประสบการณ์ที่ดีที่สุด ทุกธุรกรรมถูกออกแบบมาให้สะดวก ปลอดภัย และตรวจสอบได้ พร้อมรองรับการใช้งานผ่าน ทางเข้าวิธีแทงบอลสูงต่ำ ที่ช่วยให้เข้าถึงระบบได้อย่างรวดเร็ว ไม่ต้องรอนาน เมื่อผลการแข่งขันได้รับการยืนยัน ระบบจะประมวลผลโดยอัตโนมัติภายในไม่กี่นาที และปรับยอดเงินในบัญชีทันที ช่วยให้ผู้เล่นสามารถวางแผนการเดิมพันต่อเนื่องได้อย่างมีประสิทธิภาพ รวมถึงรองรับการใช้งานในรูปแบบ วิธีแทงบอลสูงต่ำgame ที่ต้องการความเร็วและความแม่นยำสูงในทุกช่วงเวลา
นอกจากนี้ ระบบยังเปิดโอกาสให้ผู้เล่นสามารถนำเงินรางวัลไปใช้ต่อหรือถอนออกได้ทันที โดยไม่ต้องรอข้ามวัน รองรับการทำธุรกรรมผ่าน TrueMoney Wallet เพื่อเพิ่มความสะดวกและความเป็นส่วนตัว เหมาะสำหรับผู้ที่ต้องการความยืดหยุ่นในการจัดการเงินทุน อีกทั้งยังรองรับแนวทางการเดิมพันหลากหลาย รวมถึง วิธีแทงบอลสูงต่ำ สล็อตไม่มีขั้นต่ำ ที่ช่วยให้เริ่มต้นได้ง่ายตามงบประมาณของแต่ละคน ระบบที่รวดเร็วและเสถียรนี้สะท้อนถึงความเป็นมืออาชีพ พร้อมมอบความมั่นใจให้ผู้เล่นสามารถเดิมพันได้อย่างต่อเนื่องและเต็มประสิทธิภาพ


การแข่งขันในตลาดเว็บไซต์พนันฟุตบอลออนไลน์มีความเข้มข้นมากขึ้นเรื่อย ๆ แต่ Ufabet ยังคงรักษาตำแหน่งผู้นำอย่างเหนียวแน่น และเป็นตัวเลือกอันดับหนึ่งสำหรับนักพนันที่ต้องการความมั่นใจในการเดิมพัน ด้วยระบบที่ทันสมัย การเข้าถึงง่าย และการให้บริการที่โปร่งใส Ufabet มุ่งเน้นการตอบสนองความต้องการของผู้เล่นอย่างครบวงจร ไม่ว่าจะเป็นการเดิมพันกีฬาออนไลน์ เกมสล็อต หรือแม้แต่คาสิโนสด นอกจากนี้ Ufabet ยังมีฟีเจอร์และแนวทางที่หลากหลาย เช่น วิธีแทงบอลสูงต่ำสล็อต, วิธีแทงบอลสูงต่ำ คาสิโน และ วิธีแทงบอลสูงต่ำ โปรโมชั่น เพื่อช่วยให้ผู้เล่นสามารถวางแผนการเดิมพันและสร้างผลกำไรได้อย่างมีประสิทธิภาพ
สิ่งที่ทำให้ Ufabet โดดเด่นกว่าคู่แข่งคือการผสมผสานระหว่างเทคโนโลยีและการให้บริการลูกค้าอย่างมืออาชีพ สมาชิกสามารถเข้าถึงข้อมูลการแข่งขันแบบเรียลไทม์ วิเคราะห์สถิติและอัตราต่อรองได้ง่าย ๆ รวมถึงใช้ฟีเจอร์ วิธีแทงบอลสูงต่ำสล็อต และ วิธีแทงบอลสูงต่ำ คาสิโน ในการเดิมพันแต่ละรอบได้อย่างแม่นยำ ระบบนี้ช่วยให้ผู้เล่นมั่นใจว่าทุกการเดิมพันเป็นธรรมและตรวจสอบได้ ขณะเดียวกัน โปรโมชั่นพิเศษเช่น วิธีแทงบอลสูงต่ำ โปรโมชั่น ช่วยเพิ่มมูลค่าให้ผู้เล่นทุกครั้งที่ลงทุน ทำให้ Ufabet เป็นแพลตฟอร์มที่ครบครันและได้รับความไว้วางใจอย่างต่อเนื่องจากนักพนันทั้งมือใหม่และมือโปรทั่วประเทศ
สำหรับทุกองค์กรที่เกี่ยวข้อง ความปลอดภัยและความน่าเชื่อถือถือเป็นปัจจัยสำคัญสูงสุด เว็บไซต์นี้ดำเนินการภายใต้การดูแลของบริษัทขนาดใหญ่ที่จดทะเบียนอย่างถูกต้องตามกฎหมาย และได้รับการรับรองจาก PAGCOR (Philippine Amusement and Gaming Corporation) ซึ่งเป็นหน่วยงานกำกับดูแลด้านการพนันของฟิลิปปินส์ การดำเนินงานทั้งหมดเป็นไปตามมาตรฐานสากล ทั้งในด้านความโปร่งใส การปกป้องข้อมูล และการจัดการธุรกรรมทางการเงิน สมาชิกจึงมั่นใจได้ว่าทุกการเดิมพันปลอดภัย ได้รับการตรวจสอบ และมีความยุติธรรม 100% ตั้งแต่เริ่มใช้งานจนถึงการถอนเงินรางวัล
อัตราต่อรองมาตรฐานสำหรับการเดิมพันฟุตบอลอยู่ที่ 4 แซท (0.45 กะรัต) ซึ่งแม้เพียงความแตกต่างเล็กน้อยในอัตราต่อรองนี้ก็สามารถสร้างความแตกต่างอย่างมากต่อเงินรางวัลของผู้เล่นเมื่อชนะ เราออกแบบค่าธรรมเนียมให้น้อยที่สุดเท่าที่เป็นไปได้ เพื่อให้ผู้เล่นได้รับผลตอบแทนสูงสุดจากการเดิมพันทุกครั้ง ระบบนี้ช่วยให้การลงทุนของคุณคุ้มค่าและเพิ่มโอกาสในการทำกำไรได้มากขึ้น ทั้งยังสร้างความมั่นใจว่าอัตราการจ่ายรางวัลมีความยุติธรรม โปร่งใส และตรวจสอบได้ตามมาตรฐานสากล
เว็บไซต์นี้มอบอิสรภาพทางการเงินอย่างแท้จริงให้กับผู้เล่นทุกคน โดยไม่จำกัดจำนวนเงินเดิมพันหรือเงินฝากขั้นต่ำ คุณสามารถเริ่มเดิมพันได้ตั้งแต่เพียง 1 บาทเท่านั้น ไม่ว่าคุณจะเป็นนักพนันมือใหม่หรือผู้เล่นประสบการณ์สูงก็สามารถเข้าร่วมสนุกได้อย่างเต็มที่ ระบบรองรับการถอนเงินรางวัลตามต้องการอย่างรวดเร็วและปลอดภัย ทำให้คุณมั่นใจได้ว่าทุกการลงทุนมีความยืดหยุ่นสูงสุด พร้อมทั้งสร้างโอกาสในการทำกำไรอย่างต่อเนื่องโดยไม่มีข้อจำกัดใด ๆ เพิ่มความสะดวกสบายและความมั่นใจในทุกการเดิมพัน


การเดิมพันฟุตบอลออนไลน์ไม่ใช่แค่เรื่องของโชค แต่เป็นการผสมผสานระหว่างทักษะการวิเคราะห์ ความเข้าใจในเกม และความตื่นเต้นของการแข่งขัน ผู้เล่นจำนวนมากจึงให้ความสำคัญกับการเรียนรู้ วิธีแทงบอลสูงต่ำ เพื่อเพิ่มโอกาสในการตัดสินใจอย่างแม่นยำ แพลตฟอร์มที่ดีจะช่วยให้คุณเข้าถึงข้อมูล อัตราต่อรอง และสถิติได้ครบถ้วน รวมถึงรองรับ วิธีแทงบอลสูงต่ำ เข้าสู่ระบบ ที่รวดเร็ว ใช้งานง่าย และไม่ซับซ้อน ทำให้คุณสามารถเริ่มเดิมพันได้ทันทีโดยไม่พลาดช่วงเวลาสำคัญของการแข่งขัน
นอกจากนี้ วิธีแทงบอลสูงต่ำเว็บพนัน ที่มีคุณภาพควรมาพร้อมกับตัวเลือกการเดิมพันหลากหลาย โปรโมชั่นที่คุ้มค่า และระบบที่เสถียรเพื่อรองรับการเดิมพันแบบเรียลไทม์ คุณจะได้สนุกกับการเชียร์ทีมโปรดไปพร้อมกับโอกาสสร้างผลตอบแทนอย่างมีเหตุผล ทุกแมตช์จึงไม่ใช่แค่ความบันเทิง แต่เป็นโอกาสในการพัฒนาทักษะและสร้างประสบการณ์ใหม่ ๆ ที่น่าจดจำ พร้อมความมั่นใจในระบบที่โปร่งใสและเชื่อถือได้ในทุกการใช้งาน